I Tried This Simple Magnet Hack for Hanging Kids’ Artwork—and It’s Brilliant
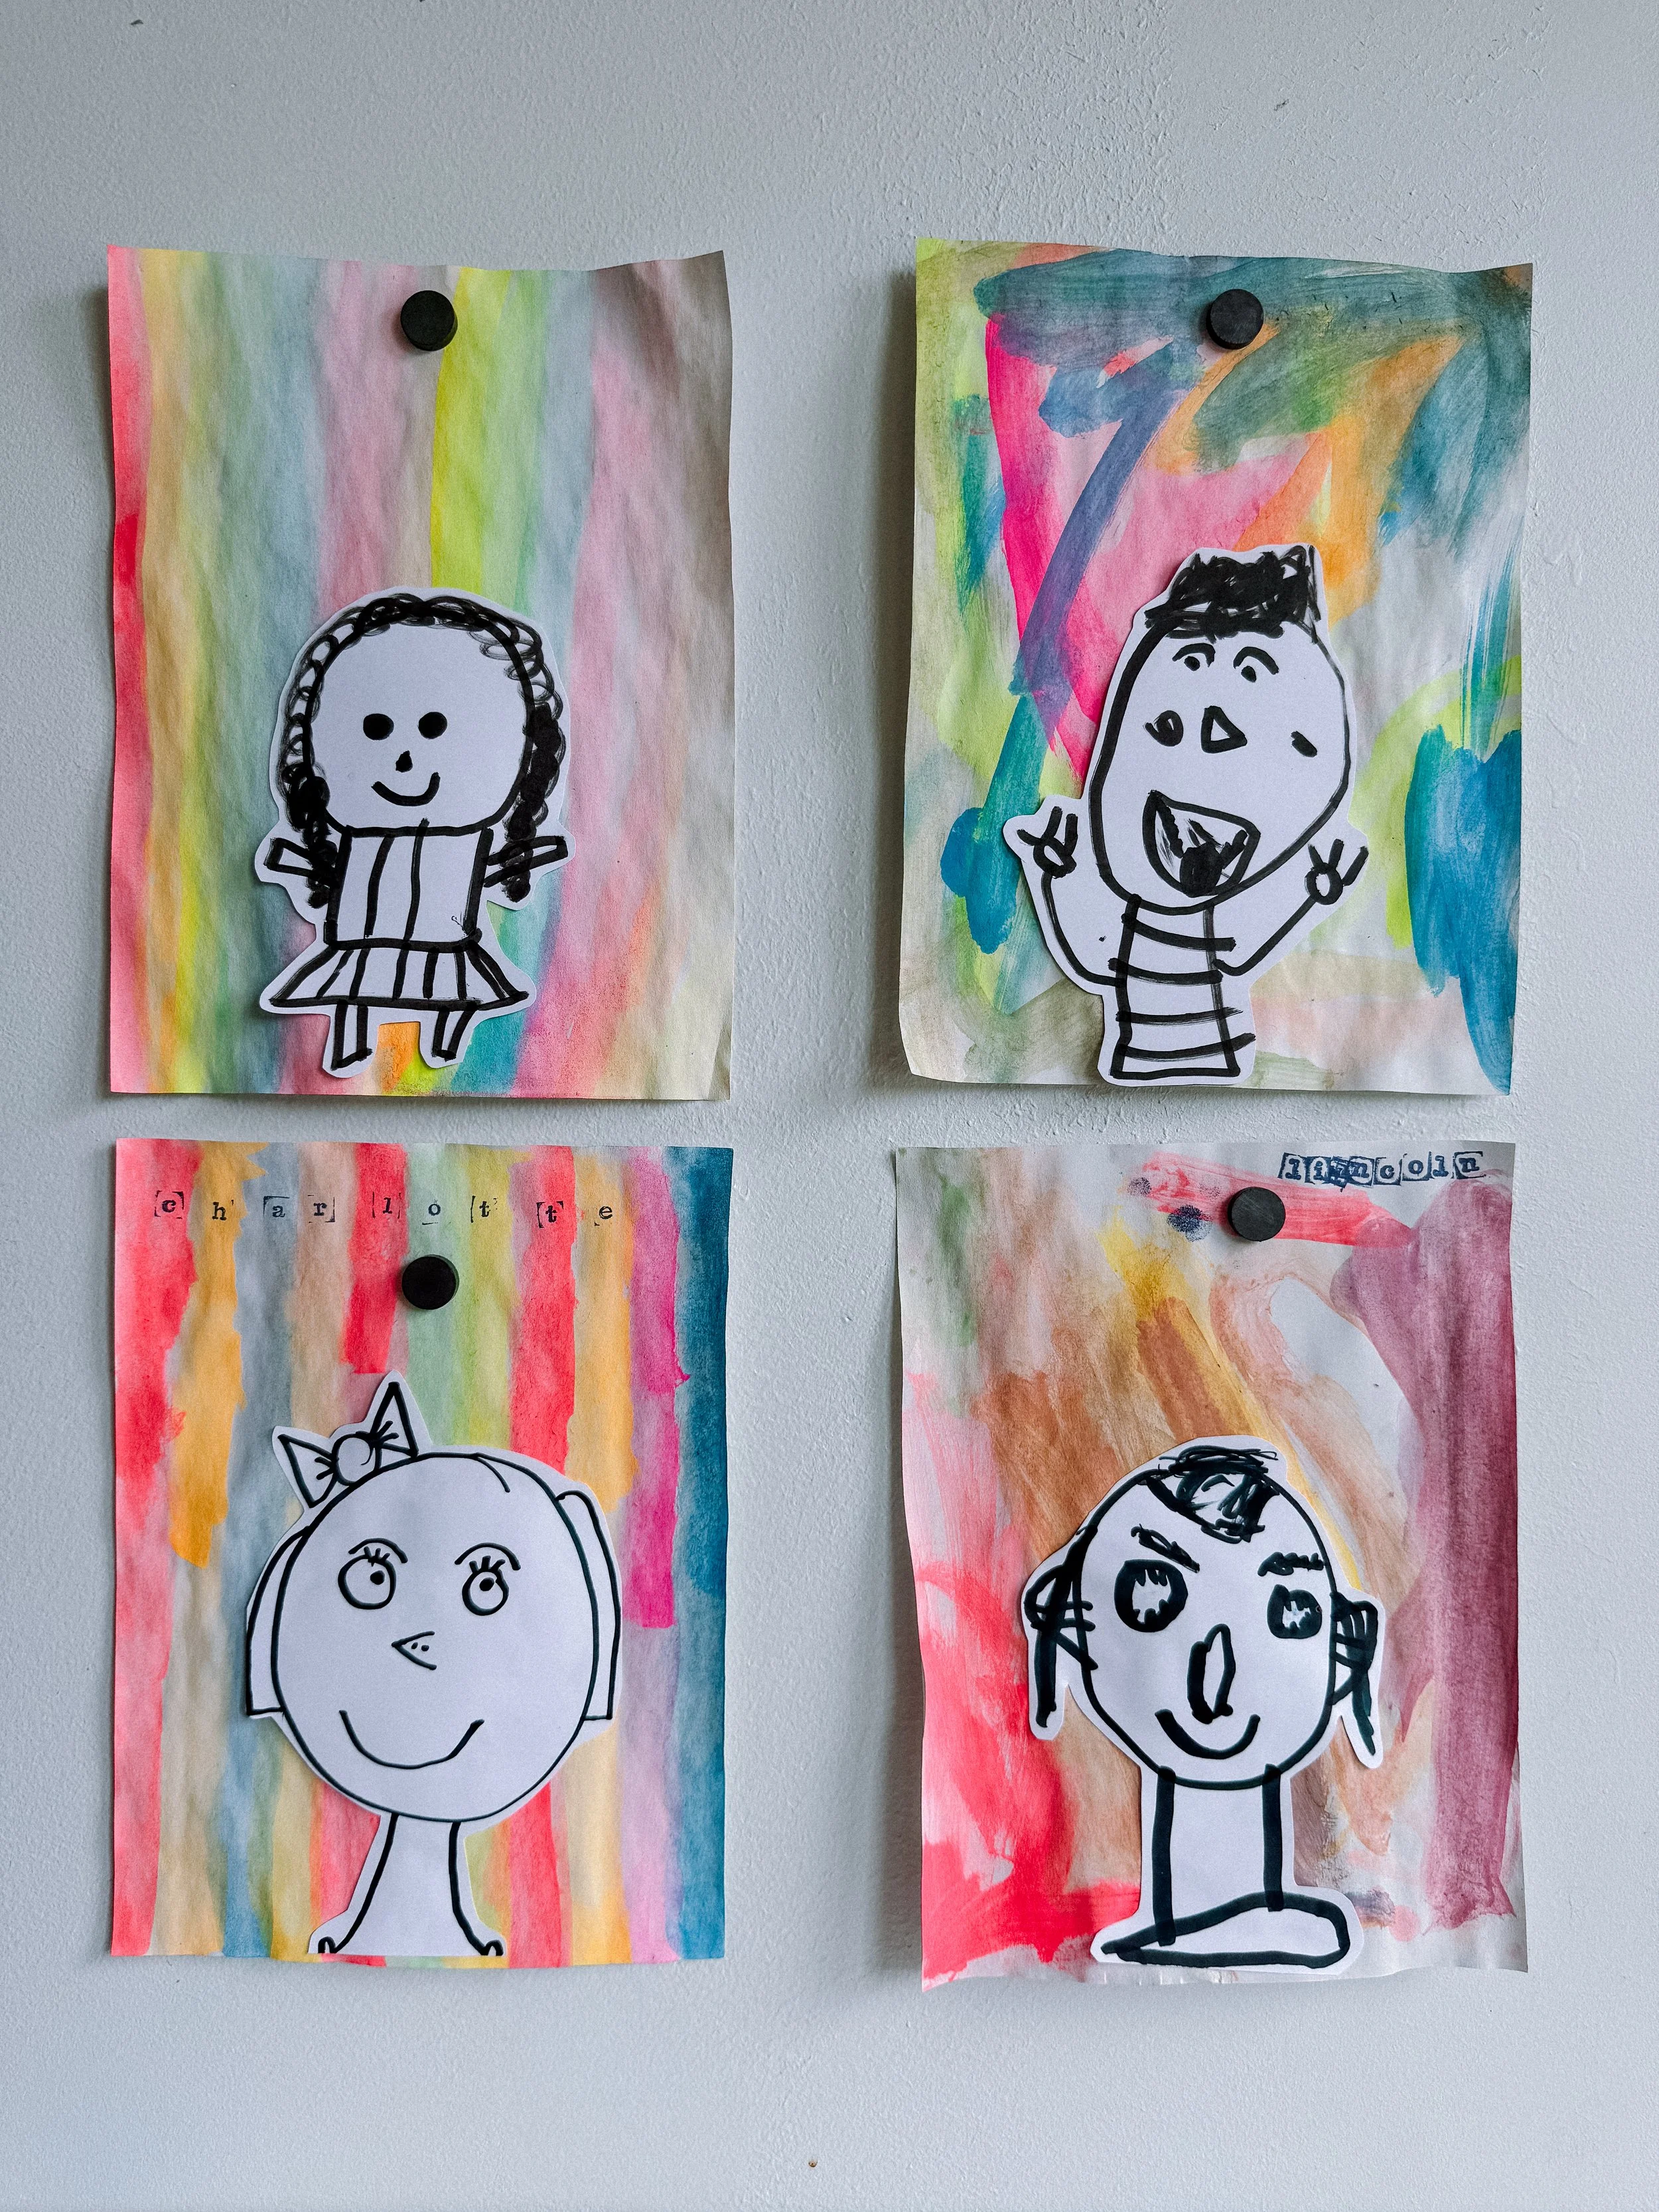
Simplest TEMPORARY way to hang kid’s art! All with two things.
Like most parents, I have approximately 4,000 pieces of kids’ artwork and only so many places to put them.
Some creations are taped to the refrigerator. Some are stacked on the counter “for now.” Some make their way into a keepsake bin—and others mysteriously disappear when no one is looking.
But I’m always searching for a simple way to hang kids’ artwork that:
Doesn’t require buying a collection of frames
Makes it easy to change the artwork
Doesn’t leave the wall covered in visible tape
Actually makes the art feel special
Then I saw someone use magnets and painter’s tape to create an almost invisible kids’ art display.
Naturally, I had to try it.
The Easy Way to Hang Kids’ Artwork with Magnets
This idea is almost suspiciously simple. Seriously.
You tape one magnet directly to the wall using painter’s tape. Then you place the artwork over it and attach a second magnet to the front.
The two magnets hold the paper between them, creating a simple magnetic art display without installing a magnetic board or putting the artwork inside a frame.
When your child brings home something new, you simply remove the front magnet, switch the artwork, and put the magnet back.
That’s it.
What You’ll Need
You will need two magnets for each point where you want to secure the artwork. One magnet sits underneath the paper, taped to the wall, and the second magnet goes on top of the artwork.
For a lightweight piece of paper, one or two sets of magnets may be enough. Heavier paper, cardboard, or layered artwork may need four sets—one near each corner.
How to Make a Magnetic Kids’ Art Display
Step 1: Lay out the painter’s tape
Place a strip of painter’s tape on your work surface with the sticky side facing up.
Step 2: Add your magnets
Space the magnets along the sticky side of the tape. Leave enough room between them so you can cut the tape into individual pieces.
Step 3: Cut around each magnet
Cut the painter’s tape into small sections, leaving enough tape around every magnet to hold it securely against the wall.
You’ll now have individual magnets with their own little painter’s-tape backing.
Step 4: Tape the magnets to the wall
Decide where you want to display the artwork and press the taped magnets onto the wall.
Make sure the tape—not the magnet itself—is what touches the wall.
Step 5: Add the artwork
Place your child’s artwork over the hidden magnets. Then add a second magnet to the front of the paper in the same spot.
The magnets will connect through the artwork and hold it in place.
Why I Love This Kids’ Art Display Idea
As a former family photographer and the owner of a children’s art studio, I care deeply about displaying what kids create.
Kids’ art is real art.
It doesn’t need to match the couch, and it doesn’t need to look like something an adult would hang in a gallery. Displaying it tells our children that their ideas, choices, and creativity are worth noticing.
But I also know that parents need solutions that are realistic.
I love a beautiful framed children’s art wall, but framing every painting that enters my house would quickly become a full-time job. This magnet hack gives the artwork a designated place while still making it incredibly easy to rotate.
It’s especially helpful for:
Playrooms
Kids’ bedrooms
Homework areas
Hallways
Kitchens
Homeschool spaces
Children’s art rooms
Seasonal art displays
You could use one set of magnets for a rotating “artwork of the week” or arrange several sets to create an entire mini gallery wall.
A Few Things to Know Before Trying It
Painter’s tape is generally designed to be removable, but every wall and paint finish is different. Test a small piece in an inconspicuous area before creating your display—especially if the paint is new, delicate, textured, or already peeling.
Remove the tape slowly and gently rather than pulling it straight away from the wall.
You’ll also want to choose magnets strong enough to connect through the paper. Very small craft magnets may not hold thick watercolor paper or layered artwork securely.
Most importantly, small magnets can be extremely dangerous if swallowed. Keep loose magnets completely out of reach of babies and young children. This display should be installed and managed by an adult and placed where children cannot remove the magnets.
Can You Use This for Heavier Kids’ Artwork?
This method works best for:
Printer paper
Construction paper
Drawings
Paintings on lightweight paper
Coloring pages
Thin watercolor paper
For heavier artwork, try using a magnet in each corner. If the piece contains thick cardboard, clay, wood, or bulky collage materials, you’ll likely need a more secure hanging method.
An Easier Way to Celebrate More of Their Art
Not every kids’ art display needs to be an elaborate DIY project.
Sometimes the best idea is the one you can set up in a few minutes—and continue using after the initial burst of motivation wears off.
This one works for me because it makes changing the artwork almost effortless. There are no frames to open, clips to reinstall, or new pieces of tape to roll up every time.
Just lift the magnet, switch the art, and move on with your day.
And maybe—just maybe—the kitchen counter will have one less pile on it.
Save This Kids’ Art Display Idea for Later
If your refrigerator has run out of room, save this simple magnetic art display to your kids’ art, playroom, or home organization board on Pinterest.
And if you try it, I’d love to know where you use it in your home.
This post may contain affiliate links. If you purchase something through one of my links, I may earn a small commission at no additional cost to you. I only share products and ideas I genuinely use or would recommend.